基础设置
PVE 7.X 换源
首先查看 cat /etc/os-release 文件,发现 PVE 是基于 Debian 11 代号为:bullseye 的版本,所以换源的思路就简单了,直接使用下面的一些命令就行:
# 注释企业源
echo "#deb https://enterprise.proxmox.com/debian/pve bullseye pve-enterprise" > /etc/apt/sources.list.d/pve-enterprise.list

# PVE 软件源更换
wget https://mirrors.ustc.edu.cn/proxmox/debian/proxmox-release-bullseye.gpg -O /etc/apt/trusted.gpg.d/proxmox-release-bullseye.gpg

echo "deb https://mirrors.ustc.edu.cn/proxmox/debian/pve bullseye pve-no-subscription" > /etc/apt/sources.list.d/pve-no-subscription.list

echo "deb https://mirrors.ustc.edu.cn/proxmox/debian/ceph-pacific bullseye main" > /etc/apt/sources.list.d/ceph.list

sed -i.bak "s#http://download.proxmox.com/debian#https://mirrors.ustc.edu.cn/proxmox/debian#g" /usr/share/perl5/PVE/CLI/pveceph.pm

# 备份 Debian 更新源
mv /etc/apt/sources.list /etc/apt/sources.list.bak

# Debian 系统源更换
echo "deb https://mirrors.tuna.tsinghua.edu.cn/debian/ bullseye main contrib non-free" > /etc/apt/sources.list
echo "deb https://mirrors.tuna.tsinghua.edu.cn/debian/ bullseye-updates main contrib non-free" >> /etc/apt/sources.list
echo "deb https://mirrors.tuna.tsinghua.edu.cn/debian-security bullseye-security main contrib non-free" >> /etc/apt/sources.list
echo "deb https://mirrors.tuna.tsinghua.edu.cn/proxmox/debian bullseye pve-no-subscription" > /etc/apt/sources.list.d/pve-no-subscription.list

# 更新测试一下
apt update
可以看到,除了第一个我们安装的 网络穿透 - ZeroTier, 其他所以全部走国内的更新源了:
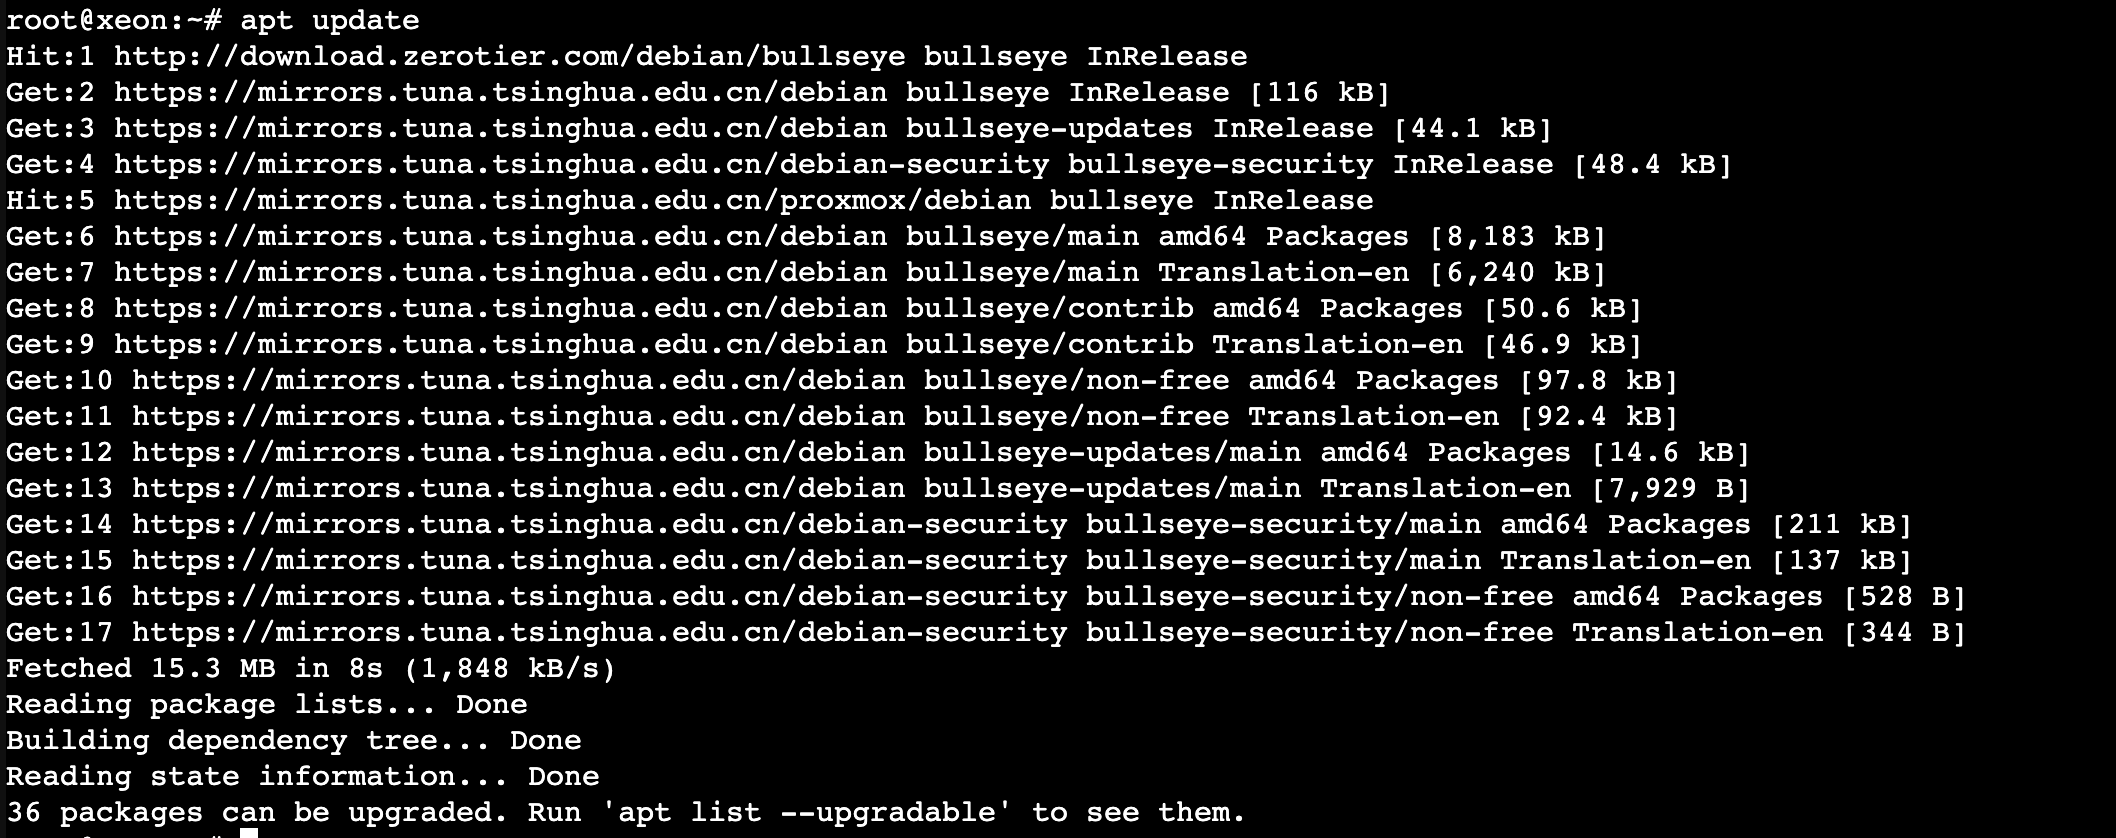
最后看一下我们存储库的详情,下面这个「没有启用Proxmox VE存储库,你没有得到任何更新!」无所谓,我们 PVE 安装好了本来就是不随便升级的,所以不更新正如我意,不影响我们正常 apt install 安装软件就完事了:

修改 CT 模板源
LXC 容器的模板默认下载很慢,也需要我们替换一下才可以:
cp /usr/share/perl5/PVE/APLInfo.pm /usr/share/perl5/PVE/APLInfo.pm_back

sed -i 's|http://download.proxmox.com|https://mirrors.tuna.tsinghua.edu.cn/proxmox|g' /usr/share/perl5/PVE/APLInfo.pm
相当于备份一下然后直接替换修改了 /usr/share/perl5/PVE/APLInfo.pm 文件,重启 PVE 服务即可生效:
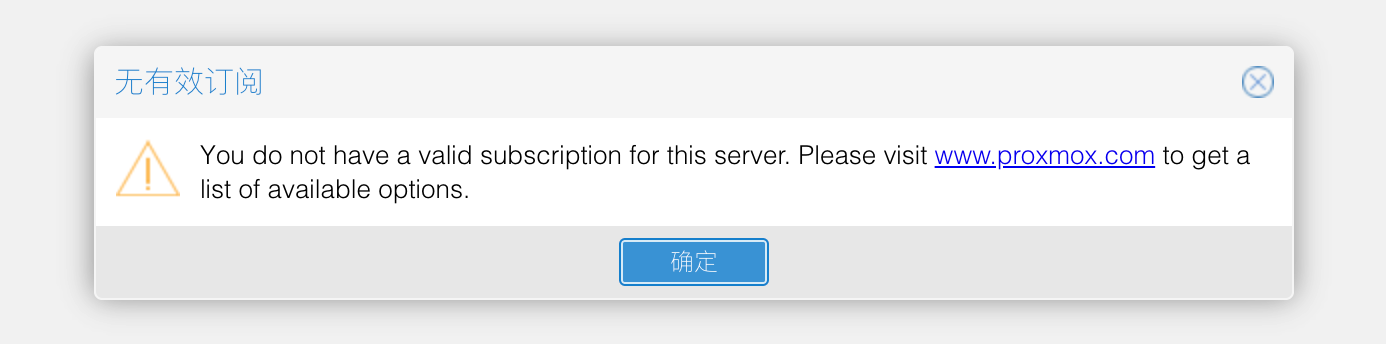
删除订阅弹窗
PVE 的免费用户每次登录会有弹窗显示:
弹窗代码主要在这个文件里面:
搜索关键词:Ext.Msg.show 可以定位到相关弹窗代码:
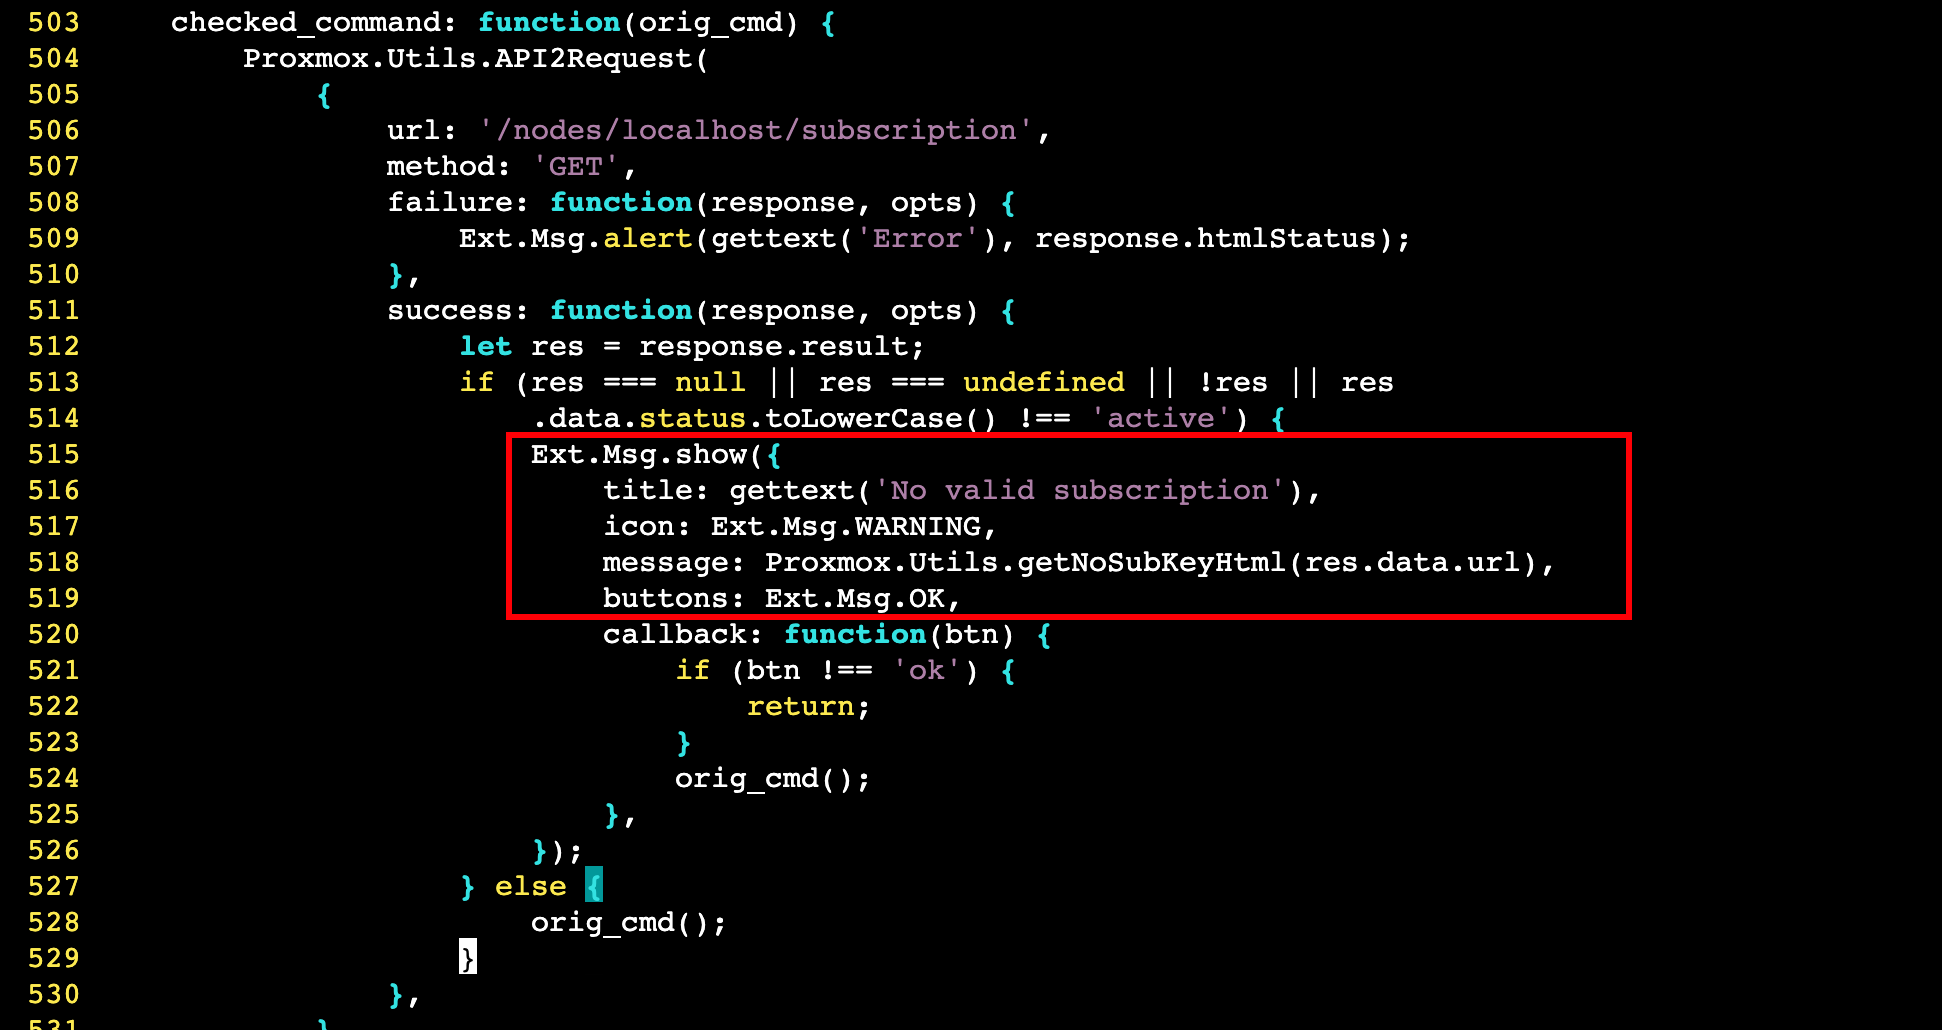
所以根据上面的思路,PVE 7.X 最终删除订阅弹窗命令如下:
sed -Ezi.bak "s/(Ext.Msg.show\(\{\s+title: gettext\('No valid sub)/void\(\{ \/\/\1/g" /usr/share/javascript/proxmox-widget-toolkit/proxmoxlib.js
改完重启下 pveproxy 服务生效:
如果还没有生效的话,清空一下浏览器的缓存即可。其实这个操作就算手贱改错了也没关系,会在同级目录下备份一个 proxmoxlib.js.bak 文件,还原回去就行了。
国光的偏好设置
理论上宿主机越少操作越好,防止宿主机被污染挂了,那 All in one 直接原地 Boom,但是 PVE 自带的 shell 操作起来效率确实不高,所以国光我还是忍不住要折腾一下的,个人觉得还行没有怎么动底层操作。
Vim 优化
内容如下:
重新载入终端即可生效 Vim 的一些配置配色
zsh shell 方案
# 安装依赖
apt install git

# 安装zsh
apt install zsh

# 更改默认shell为zsh
chsh -s /bin/zsh

# 安装oh-my-zsh
sh -c "$(curl -fsSL https://raw.githubusercontent.com/robbyrussell/oh-my-zsh/master/tools/install.sh)"
- 命令补全插件:zsh-autosuggestions
git clone 下载插件到 zsh 的插件目录下:
git clone https://github.com/zsh-users/zsh-autosuggestions $ZSH_CUSTOM/plugins/zsh-autosuggestions
重新加载 zsh 即可生效。
- 快捷目录跳转插件:autojump
使用 APT 可以直接安装 autojump 插件:
然后在 zshrc 配置文件中修改如下内容:
输入 zsh 命令生效配置后即可正常使用 j 命令,下面是简单的演示效果:
# root @ pve in ~/test/23333 [18:45:14]
$ pwd
/root/test/23333

# root @ pve in ~/test/23333 [18:45:16]
$ cd ~


# root @ pve in ~ [18:45:17] 直接 j 2 就跳转到历史目录了
$ j 2
/root/test/23333

# root @ pve in ~/test/23333 [18:45:20]
$ pwd
/root/test/23333
- 命令语法检测插件:zsh-syntax-highlighting
git clone 下载插件到 zsh 的插件目录下:
git clone https://github.com/zsh-users/zsh-syntax-highlighting.git $ZSH_CUSTOM/plugins/zsh-syntax-highlighting
然后在 zshrc 配置文件中修改如下内容:
其他 zsh 的优化操作,关掉 URL 反斜杠转义以及禁用 zsh 自动更新:
echo "DISABLE_MAGIC_FUNCTIONS=true" >> ~/.zshrc
echo "zstyle ':omz:update' mode disabled" >> ~/.zshrc